Embroidered tweed mittens

A few weeks ago I bought Lina Odell’s book “Broderade vantar” (Embroidered mittens) mainly for the scrumptious photography. I figured I would get lots of inspiration from the excellent folkcostume garment and Lina’s neverending creativity with traditional, modern and and take-what-you have, use what you want solutions. I was not disappointed and found myself making a pair of embroidered tweed mittens.

My original plan was to just look at the photos and be inspired by materials, designs and details. And while I was, I also wanted to make some of the mittens.
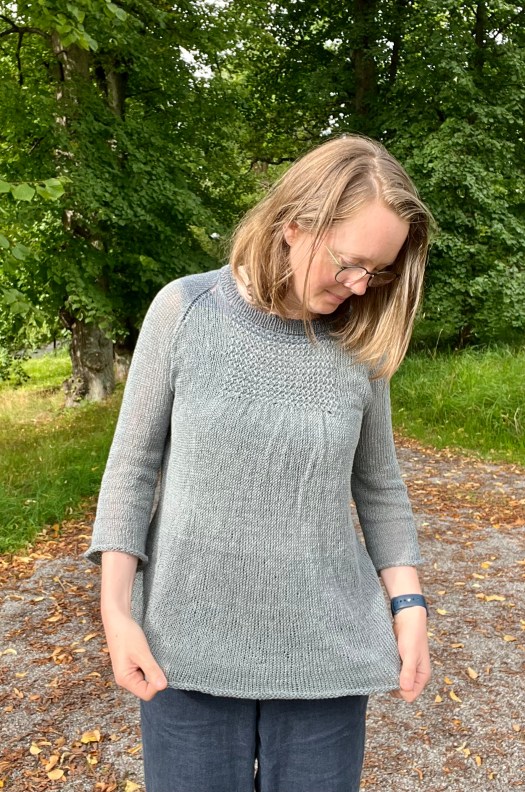
Embroidered mittens

In her book ”Broderade vantar”, Lina has studied old mittens from areas in Sweden with a rich folk costume heritage. Many of the saved or documented mittens are bridal mittens and part of a geographical folk costume tradition. Lina has interpreted old mittens and composed new designs inspired by details and techniques in regional folk costumes and offered as patterns in the book.

The book is written in Swedish and although I hope it will be translated into English, I honestly think people who don’t read Swedish can understand the patterns. The images are clear and the templates straightforward. A while ago I actually bought a book with sewing patterns in Japanese. The many illustrations are very clear and with the Google Translate app I can easily translate the text into English.

Kattis half-mitts

I have no heritage from any area in Sweden with a folk costume tradition and I am not interested in making a folk costume for myself. I just want to investigate techniques and materials for my own pleasure and make things that work with a modern wardrobe.

Embroidered tweed mittens with cashmere details. The pocket comes from the same Harris Tweed jacket. You can see the difference between the fulled sleeves I used for the mittens and the original fabric in the pocket.

For my first project I chose the Kattis half-mitts. They are inspired by patterns typical for Dala-Floda in country Dalarna and sewn in dyed leather, but I chose other materials.

Tweed

I like to use material I already have, and my mind went to an eBayed Harris Tweed jacket I had butchered two years ago to sew a tie-on pocket (which you can also see in the image above). I had used the side pocket of the jacket for the opening of my tie-on pocket. Just to make it a little bit more interesting, I had cut it on the bias, placing the pocket at a diagonal. To make the most of the sleeves I used for my mittens, I cut the pieces for the mittens lengthwise. I giggled at the mischief of cutting the fabric in unconventional ways.

Cashmere

Ten years ago or so, my mother got a bright red cashmere sweater from my father. Her joy didn’t last long, though, since the sweater was washed too warm and shrunk to the size of my daughter’s who was then around 9. My mother gave it to her, but as the felted material was too dense and warm, she never wore it. It was stuffed into the back of her closet and later into my fabric cabinet.

Second-hand butchered and fulled Harris Tweed + accidentally felted cashmere + fleamarket silk thread = perfect mitten love. The cashmere is the end of the sleeves, including the cuff. The sweater cuffs are just folded over the tweed cuffs (and sewn in place over the thumb and finger openings). The tweed comes from the lengths of the jacket sleeves.

When I planned the mittens I realized the fabric would be perfect for the inner mittens. Originally I had planned to cut the fabric from the torso, but when I looked at the sleeves I realized how perfect it would be to use them, with the sleeve cuffs as mitten cuffs folded over the tweed as a design detail.

Embroidery

I like to hunt on Swedish eBay (Tradera) for old haberdashery boxes with needles and notions in it. I bought one a few years ago and still see it as my treasure box. A couple of weeks ago I noticed that my son, who recently moved to his own apartment, had saved the same eBay ad as I had – a haberdashery box with lots of needles, buttons and sewing silk. We decided to bid for the auction and share the content.. And so I have an assortment of silk thread, perfect for mitten embroidery. None of us wanted the box, though, it was hideous – although with a charming touch – and in plastic.

Embroidery with silk thread was a bit tricky, though, especially since I held the thread double. I had marked the pattern by basting it onto the mittens, which wasn’t the best choice. And hearts are really, really difficult to embroider! I don’t know why, but I struggled a lot with them.

Wonky

Lots of the details in this project are wonky. The hearts as I mentioned, but also seams and fit. The herringbone stitches over the thumb seams is not a pretty sight and there is a colour change in the chain stitch. But overall, it’s a beautiful pair of mittens, wonkiness included.

Lina writes about this in the introduction to the book – none of the old mittens she made her interpretations of were symmetrical or complete. All had their peculiarities like sudden changes of colours, assymetries, a missed mirroring in a pattern. She says that it is the wonkiness that shows the person behind the craft. The mittens are really just reflections of our own wonkiness. I embrace the beauty of both.

You can find me in several social media:

  • This blog is my main channel. This is where I write weekly posts, mainly about spinning. Do subscribe!
  • I share essay-style writing on Substack. Come and have a look!
  • My youtube channel is where I release a lot of my videos. Subscribe to be sure not to miss anything!
  • I have a facebook page where I link to all my blog posts, you are welcome to follow me there.
  • I run an online spinning school, welcome to join a course! You can also check out my course page for courses in Sweden or to book me for a lecture.
  • On Patreon you can get early access to new videos and other Patreon only benefits. The contributions from my patrons are an important way to cover the costs, time and energy I put into the videos and blog posts I create. You can read more about my Patreon page here.
  • Follow me on Instagram.  I announce new blog posts, share images from behind the scenes and post lots of woolliness.
  • Read the book Knit (spin) Sweden! by Sara Wolf. I am a co-author and write in the fleece section about how I spin yarn from Swedish sheep breeds.
  • I am writing a book! In the later half of 2025 Listen to the wool: A why-to guide for mindful spinning will be available. Read more about the book here.
  • In all the social media I offer, you are more than welcome to contact me. Interacting with you helps me make better content. My private Facebook page, however, will remain private.
  • I support Centro de textiles tradicionales del Cusco, a group of talented textile artists in Cusco, Peru who dedicate their work to the empowerment of weavers through the revitalization and sustainable practice of Peruvian ancestral textiles in the Cusco region. Please consider supporting their work by donating to their causes.

Daily hat

Hats are the ultimate knitting projects. They are small enough to fit in a pocket, they are usually knit in the round, they don’t have to be matched with a twin, you can experiment with difficult techniques without giving up and you can finish them within a week. Join me in my daily hat parade.

It all started with the Waiting for rain shawl I knit in November, from stashed and ripped handspun yarns. When I had finished it there was still yarn left, so I knit a hat. And another. And another. Suddenly I stand here with seven hats that I have knit during November and December from my stashed handspun yarns. That’s a daily hat for every day of the week.

Seven knit hats in a circle.
A daily hat for the whole week, all from my handspun stashed yarns.

Stranded knitting and Algae

The first hat I fell for was Algae by Marie Amelie designs. It’s a stranded colourwork hat with an algae pattern, which suits my daily dip in the lake perfectly. The folded brim together with the stranded colourwork keeps my head toasty and warm on even the coldest of days.

The original pattern is knit in a white main colour and yellow background colour. I chose three different background colors that on a sunny day resemble the colour of the water. I used all three of them in the Waiting for rain shawl.

A woman hanging in the lake from a buoy pole. She is wearing a stranded colourwork hat with white algae and a petrol, turquoise and dusty blue background. She is also wearing a bikini and gloves. There is snow on the buoy pole.
The algae hat fits my daily dips perfectly in both design and warmth.

The Algae hat has quickly become my favourite hat for this time of year. The folded brim is soft and gentle and I love the colour scheme.

Mindless ribbing hipster hat

I have knit a couple of hats for my husband, but they are all starting to fall apart. I wanted to knit him a new one, a fairly plain hat. The HipsterHat by PetiteKnit was my choice, together with a soft 2-ply yarn I spun ages ago from an Shetland Eskit fleece.

This was a mindless knit, just the 2×2 ribbing all the way plus some sweet decreases towards the crown. I love how the hat can be worn in different ways – straight, folded or double folded.

Arkanoid garter building blocks

I have always been curious about Woolly Wormhead’s hat patterns, so I searched among her hat designs. I wanted to knit something for my son who is an architect student. Woolly Wormhead calls herself a hat architect and the Arkanoid pattern resembles a brick Wall, so the match was perfect.

The yarn I used was a 2-ply finull yarn I spun a couple of years ago and dyed in an ice bath with fresh indigo leaves.

Greystone cables

My daughter has sensitive skin, so I used the softest handspun I could find for her, Swedish Jämtland wool. I had ripped this yarn from an older project. Since the yarn was so fine I held it double throughout the knitting.

I chose the Greystone hat pattern by Melissa Thomson (Sweet fiber), a fairly simple cable pattern. My daughter is quite picky, but I hope a subtle cabled natural white hat works for her.

Jessica Jones and linen stitch

Okay, so if a hat is called If Jessica Jones had a hat (by SMINÉ), don’t you just have to knit it? I know I do.

A woman wearing a petrol coloured hat with an envelope crown.
Both the linen stitch and the envelope crown were new to me. While I didn’t enjoy the slowness of the knitting, I love how my If Jessica Jones had a hat hat turned out.

The hat is knit in linen stitch, which gives the loveliest weave-like structure. The pattern is knit one, slip one with the yarn in front, from bottom to top. This took ages. The moving of the yarn from back to front and back again slowed the pace down, but I do love the result. The yarn I used (the same yarn as in the brim of the algae hat) was very fine, so I held it double. I realized there was a risk there wouldn’t be enough yarn for the whole hat, so I started to think about what colour to use for the crown, but in the end there was just enough yarn.

Growing plants

I had a few skeins of gradient yarn from a brown fleece I had sorted into different shades. I wanted to use the gradient in another hat, and I chose the Gro hat by Fiber Tales.

I started at the brim with the darkest colour and ended two shades later at the crown. The pattern is sort of a cable pattern with grass-like plants. The pattern also includes knitting three stitches together right after a cable, which was quite cumbersome, at least the way I did it. So not the most comfortable and swift knit, but I love the design and my subtle gradient.

Shortrows and Rhinebeck

Another Woolly Wormhead design is the Rhinebeck hat, this time with an intricate bauble pattern made sideways with a gazillion shortrows. The pattern description looks daunting with its 88 row pattern repeat for 13 panels, but once you get the hang of it you can knit it with relative ease.

At first I was reluctant, I didn’t want it to look too loud. After having browsed through the projects on Ravelry I knew how I wanted to combine the colours. I chose blue-ish and brown colours for the baubles and white for the stripes to keep it all together. I love the result.

My plan is to hang the hats in the Christmas tree and let my family find them. Perhaps they go for the hats I had in mind for them, perhaps they surprise me. I’m keeping the Algae for myself, though.

Happy spinning!


You can find me in several social media:

  • This blog is my main channel. This is where I write posts about spinning, but also where I explain a bit more about videos I release. Sometimes I make videos that are on the blog only. Subscribe or make an rss feed to be sure not to miss any posts.
  • My youtube channel is where I release a lot of my videos. Subscribe to be sure not to miss anything!
  • I have a facebook page where I link to all my blog posts, you are welcome to follow me there.
  • I run an online spinning school, welcome to join a course! You can also check out my course page for courses in Sweden or to book me for a lecture.
  • On Patreon you can get early access to new videos and other Patreon only benefits. The contributions from my patreon only benefits. The contributions from my patrons is an important way to cover the costs, time and energy I put into the videos and blog posts I create. Shooting and editing a 3 minute video takes about 5 hours. Writing a blog post around 3. You can read more about my Patreon page here.
  • Follow me on Instagram.  I announce new blog posts, share images from behind the scenes and post lots of woolliness.
  • Read the book Knit (spin) Sweden! by Sara Wolf. I am a co-author and write in the fleece section about how I spin yarn from Swedish sheep breeds.
  • I am writing a book! In the later half of 2025 Listen to the wool: A why-to guide for mindful spinning will be available. Read more about the book here.
  • In all the social media I offer, you are more than welcome to contact me. Interacting with you helps me make better content. My private Facebook page, however, will remain private.
  • I support Centro de textiles tradicionales del Cusco, a group of talented textile artists in Cusco, Peru who dedicate their work to the empowerment of weavers through the revitalization and sustainable practice of Peruvian ancestral textiles in the Cusco region. Please consider supporting their work by donating to their causes.

Knit, rip, reknit

Have you ever knit a garment, not really used it, ripped it and reknit it into something else? I hadn’t until just recently. Today I knit, rip, reknit and rejoice. Spoiler alert: There is no spinning in this post.

A while ago, when I was looking for inspiration for linen knits, I stumbled upon a top that I really wanted to knit. My plan was to knit it with my handspun linen yarn.

Knit, 2014

However, I did have a top that I had knit back in 2014 in a commercial yarn that was the same as the yarn required in the pattern for this new top. The commercial yarn was a beautiful linen yarn by Quince & co. that I had ordered from the U.S. for the 2014 sweater.

Back in 2014 I knit the East end top by Alicia Plummer. It’s a lovely top, but I didn’t wear it very much. Photo by Dan Waltin.

I did love the top back when I knit it, but when I wore it, it was quite fiddly. The neck was a bit on the wide side and there was always a risk of body parts or bra straps showing. It never occurred to me back then to alter the fit. Therefore I didn’t use it very much.

Rip, 2023

When I found the new pattern requiring the same yarn, I decided it was time to rip the old top. Ripping linen yarn was a bit of a detangling challenge, but after some fiddling and occasional secret cutting, I managed to undo the whole top. To even out the phone cord curls I soaked the squiggly yarn overnight and hung it to dry, lightly weighted. It worked very well, reknitting with it felt no different than when I knit with it the first time.

Reknit, 2023

The new pattern is the Seguin top, by Quince. & co. It is a simple bottom-up knit in the round stockinette raglan sweater with rolled up cuffs and hem and a simple 1×1 ribbed neck band. The detail that makes the whole sweater interesting is a rectangular chest panel in sort of a tight oats pattern. The one over two cable repeat pulls the fabric together, making it look like decreased stitches underneath the panel, but it’s exactly the same amount of stitches.

I really like this detail, that shapes the whole yoke and gives some flare from the bust down. In combination with the simple stockinette and rolled hems it is the perfect everyday want-to-live-in kind of a top.

Shortage and abundance

The further I knit on the Seguin top, the more I realized that I might need to buy a couple of extra skeins. I found an online shop in France that carried the yarn in the same colour. I bought two to be safe, but I ended up using only a quarter of a skein to finish the sweater.

A colour shirt where I needed to join a quarter of a skein of new yarn is a sweet reminder of the thriftiness that is the core of this top.

I knew there was a risk that the colours of the used, ripped and washed 2014 yarn and the new 2023 yarn wouldn’t exactly match, but it didn’t bother me. It would just be a quirky conversation starter in the name of sustainability and making do and mend.

I was right, there is a colour shift from the old to the new yarn, and I quite like it. Ripping and reknitting has been a way of taking care of precious yarn and clothe your family through rough times. Knitting in the round works very well for this purpose – once a garment has been mended and patched until it can’t be mended anymore, it has been frogged and reknit into something else.

Happy spinning!


You can find me in several social media:

  • This blog is my main channel. This is where I write posts about spinning, but also where I explain a bit more about videos I release. Sometimes I make videos that are on the blog only. Subscribe or make an rss feed to be sure not to miss any posts.
  • My youtube channel is where I release a lot of my videos. Subscribe to be sure not to miss anything!
  • I have a facebook page where I link to all my blog posts, you are welcome to follow me there.
  • I run an online spinning school, welcome to join a course! You can also check out my course page for courses in Sweden.
  • On Patreon you can get early access to new videos and other Patreon only benefits. The contributions from my patreon only benefits. The contributions from my patrons is an important way to cover the costs, time and energy I put into the videos and blog posts I create. Shooting and editing a 3 minute video takes about 5 hours. Writing a blog post around 3. You can read more about my Patreon page here.
  • Follow me on Instagram.  I announce new blog posts, share images from behind the scenes and post lots of woolliness.
  • Read the book Knit (spin) Sweden! by Sara Wolf. I am a co-author and write in the fleece section about how I spin yarn from Swedish sheep breeds.fleece section about how I spin yarn from Swedish sheep breeds.
  • In all the social media I offer, you are more than welcome to contact me. Interacting with you helps me make better content. My private Facebook page, however, will remain private.
  • I support Centro de textiles tradicionales del Cusco, a group of talented textile artists in Cusco, Peru who dedicate their work to the empowerment of weavers through the revitalization and sustainable practice of Peruvian ancestral textiles in the Cusco region. Please consider supporting their work by donating to their causes.

Milk jug covers

Inspired by a series about the downstairs and upstairs of an early 20th century estate I have dived into the world of milk jug covers. I choose beaded bobbin lace before cling film any day.

Inspiration jumps at you from everywhere, you never know what will hit you next. This time it came from Yorkshire.

Bingeing Downton Abbey

A couple of years ago I was binge watching Downton Abbey, a British series about the upstairs and downstairs of a Yorkshire estate at the turn of the last century. I have always loved the sense of detail in the series – the textiles (of course), the interiors and the kitchen utensils. All in natural materials and exquisitely executed.

I remember the very first episode, that starts on a train when Bates, the new butler, is on his way to the estate. The first scene shows the interior of the postal car where postal workers are sorting the mail in separate compartments of wooden shelves covering the walls of the whole car. Just for a few seconds, but the whole setup is there. Attention to detail like that gives me goosebumps.

One doily, one second

In one episode, it must have been in the last season, Daisy the kitchen maid tidies the last things in the kitchen late at night. She picks up what looks like a beaded doily, gently covers a jug with it and puts the jug in the pantry, the richly but sophisticatedly beaded edge weighing the doily down to keep it in place atop the jug opening.

The scene lasts for less than a second. But I couldn’t take my eyes off that beaded doily. Where did it come from? Just as the postal car on the train this must have meant something at the time.

Word hunting

I needed to know more about these beaded covers. I turned to two trusted friends, both craft counselors with deep knowledge of crafting and old utility items. None of them had seen anything like it before. So I googled. It took me a while, but I did find what I was looking for – a milk jug cover. Quite common at the time to keep flies off milk and lemonade in the U.K. but also in Australia. When the car came and there was no need for horses for kitchen deliveries, the flies became less of an issue.

I haven’t seen a Swedish equivalent to the milk jug cover, so I don’t have a Swedish word for it.

20th century tinder treasure

I knew I needed to make me a milk jug cover or two or eight. Seriously, who wouldn’t want dangling beads instead of clingfilm to protect their food? I also knew there must be thousands of doilies out there that once were the pride of one generation and a now, a couple of generations later, a nuisance.

Something for a 1920 Tinder profile?

1920 Tinder profiles would be strewn with superlatives of ladies’ skills in doily making. But now? I haven’t really seen the point of them, even though I know they are results of many hours of women’s skills and investments on the marriage market.

Rescue operation

I assume the milk jug covers were made as just that, and that the maker could plan and design for the beading as they made the doilies. My lace crocheting skills aren’t up to date, much less my bobbin lace skills, so making it from scratch was never an option.

In my quest for milk jug cover material I decided to rescue some of those doilies from disastrous fates. I bought nine from a seller on Swedish eBay – round and square, bobbin laced and crocheted, linen and cotton. Beautifully crafted in yarn finer than sewing thread. I also bought three vintage necklaces with glass beads for the beaded fringe.

21st century jug covers

A few weeks ago I started adding the necklace beads to the doilies. I had quite fun, actually, planning the colours and the design of the beading. While stitching I thought of all those women who had dedicated their time and skills to the doilies, perhaps hoping for a better life. Their thoughts laced into the doilies, mine beaded onto the edge, united in a milk jug cover.

Two milk jug covers in late December. One square in bobbin laced linen, one round in crocheted cotton. Beads from three vintage necklaces. No flies yet, but I don’t need an excuse to use the covers.

I gifted the first two to my parents. They admired them but weren’t sure they’d really use them. Just wait until August with wasps flying around the elderflower lemonade on the garden table under the birch, then they will fetch the jug covers in a second!

Clingfilm or bobbin lace?

I have just finished the third jug cover. This was the largest doily and my favourite – a square bobbin laced doily in linen yarn. The pattern features a meandering band around the edge of a linen square. I chose the heaviest glass beads and used a combination of five beads for each point of the lace pattern. My heart tingles along with the beads against the jug as I touch them.

The meandering band in the bobbin lace edging is just to die for.

I still have six doilies and hundreds of beads to play with. I don’t know if the milk jug covers I make will be used, they are a pain to iron and I have no idea how to wash them. But still. I have milk jug covers in my life now. What would you choose for an afternoon in the garden with a glass of lemonade – bobbin lace or cling film?

I’m definitely not in the market for a tinder profile, but wouldn’t it be interesting to highlight milk jug cover making skills in a profile? Just to shift the discourse, see what happens?

Oh, and I finished another one during a zoom meeting at the home office today. I used long rows of seed beads only, creating sweet curves around the edging. The vacuum cleaner will rattle from dropped seed beads the next time we clean the house.

Happy spinning!


You can find me in several social media:

  • This blog is my main channel. This is where I write posts about spinning, but also where I explain a bit more about videos I release. Sometimes I make videos that are on the blog only. Subscribe or make an rss feed to be sure not to miss any posts.
  • My youtube channel is where I release a lot of my videos. Subscribe to be sure not to missanything!
  • I have a facebook page where I link to all my blog posts, you are welcome to follow me there.
  • I run an online spinning school, welcome to join a course! You can also check out my course page for courses in Sweden.
  • On Patreon you can get early access to new videos and other Patreon only benefits. The contributions from my patreon only benefits. The contributions from my patrons is an important way to cover the costs, time and energy I put into the videos and blog posts I create. Shooting and editing a 3 minute video takes about 5 hours. Writing a blog post around 3. You can read more about my Patreon page here.
  • You are also welcome to make one-off donations on my Ko-fi page.
  • Follow me on Instagram.  I announce new blog posts, share images from behind the scenes and post lots of woolliness.
  • Read the new book Knit (spin) Sweden! by Sara Wolf. I am a co-author and write in the fleece section about how I spin yarn from Swedish sheep breeds.fleece section about how I spin yarn from Swedish sheep breeds.
  • In all the social media I offer, you are more than welcome to contact me. Interacting with you helps me make better content. My private Facebook page, however, will remain private.
  • I support Centro de textiles tradicionales del Cusco, a group of talented textile artists in Cusco, Peru who dedicate their work to the empowerment of weavers through the revitalization and sustainable practice of Peruvian ancestral textiles in the Cusco region. Please consider supporting their work by donating to their causes.

The ladies in waiting

I have a long queue of fleeces. In the storage of my sofa bed I have at the moment 12 fleeces that are washed and picked but not spun. These are my ladies in waiting.

When I buy a new fleece I try to keep a strict order – first in first out. It’s not always that easy, a new fleece is so exciting and shiny and much more tempting to dig my hands into than the older ones. But I have had fleeces that were too old go brittle, so I try my best to work my ladies in waiting in strict order.

The fleeces in the featured image above are not part of my stash.

Pressure

Out of the twelve fleeces in the sofa bed nine were shorn in the autumn of 2021. This means that nine fleeces are older than one year. I try to keep my queue no longer than one year, and obviously I have failed at keeping this goal. Having that many fleeces in my queue and knowing that the quality will deteriorate does put pressure on me.

The ladies in waiting

So, here are my ladies in waiting, all washed (with water only), picked and stored in paper bags in my sofa bed:

  • On the spinning wheel I have Nypon (Rose hip), the last of a silver medal winning finull fleece from the Swedish fleece championships of 2020. This is my oldest fleece, but still in excellent condition.
  • Elsa is a Gestrike fleece shorn in the autumn of 2021. I have sorted the fleece according to staple type and spun all of one category into a hat and a pair of mittens. The rest of the categories are neatly stored in individual bags.
  • My sweet gute fleece that I am planning to tease together with recycled sari silk is also from the autumn of 2021, but the lanolin feels a bit sticky. This will be the next fleece I spin.
  • Four Åland fleeces from 2021, long, fine, silky and delicious.
  • Three medalists from the 2021 fleece championships – Fjällnäs, Helsinge and Dalapäls wool.
  • Tabacktorp, Dalapäls and Icelandic fleeces shorn in the autumn of 2022. My most freshly shorn and therefore most attractive fleeces. I’m spinning the dalapäls fleece at the moment (see below). I have separated the Icelandic fleece into undercoat and outercoat.
  • Plus quite a lot of 80+ year old Austrian flax that I’m not that worried about.

Spinning fresh

Lately I have been spinning my newest fleece, a shiny dalapäls fleece with long, silky locks, shorn in October 2022. The fleece ruthlessly cut in line since I needed more yarn for a pair of two-end knitted sleeves that had run out of yarn. Spinning this wool this fresh is a dream – the staples are open and airy. The fibers lightly and smoothly join into the twist like a breath of fresh air and a dance. An older fleece on the other hand can be tougher to spin, as if the lanolin has gotten tired and cranky, fighting me as I try to get my head around it. An older fleece can also have become compacted and slightly felted after having been compressed in the sofa bed, even if I have picked it before storing.

Putting my foot down

As I was spinning my merengue white and fresh dalapäls fleece I realized that I need to make some changes in my fleece purchasing pattern. I don’t have to buy every unusual, unique, special or otherwise interesting fleece I see. Wool grows back again. There will be other chances. And I have enough of a network of sheep owners to get a high quality fleece when I need it, not only when I see one that looks interesting.

Sweet dalapäls yarn, spun from freshly shorn fleece.

This new and fresh thought got my shoulders to sink in relief. Spinning is such a joy to me and should never, ever be involved with pressure of any kind. It is and should always be a sanctuary, a place for creativity and making.

A new plan

I decided that I want to shorten my fleece queue to a level where it doesn’t stress me. I have so many other projects and baby ideas I want to work on– mending, upcycling, designing, destashing, course creating, webinar planning, writing etc. And of course spinning the twelve ladies in waiting, beginning with the oldest and/or most urgent fleece. I will in no way, shape of form be without craft.

So, my plan for 2023 is to not buy fleece, at least not before I have spun the 2021 fleeces. This is not a resolution, not a promise. A plan and a wish, a year of cleaning up and organizing in my idea cabinet.

A current weaving project in the local weaving room – 1/3 twill from handspun singles in both warp and weft. If you are a patron (or want to become one) you can see the beginning of this almost 4 meter weaving project in my January 2023 video postcard.

I will still spin, knit, weave and write. I will just create from what I already have. Perhaps that will give me the opportunity to expand my creative horizons. One plan is to frog old garments (handspun and commercial) that I don’t use anymore to knit new and shiny things from.

How do you deal with a large fiber stash?

Happy spinning!


You can find me in several social media:

  • This blog is my main channel. This is where I write posts about spinning, but also where I explain a bit more about videos I release. Sometimes I make videos that are on the blog only. Subscribe or make an rss feed to be sure not to miss any posts.
  • My youtube channel is where I release a lot of my videos. Subscribe to be sure not to missanything!
  • I have a facebook page where I link to all my blog posts, you are welcome to follow me there.
  • I run an online spinning school, welcome to join a course! You can also check out my course page for courses in Sweden.
  • On Patreon you can get early access to new videos and other Patreon only benefits. The contributions from my patreon only benefits. The contributions from my patrons is an important way to cover the costs, time and energy I put into the videos and blog posts I create. Shooting and editing a 3 minute video takes about 5 hours. Writing a blog post around 3. You can read more about my Patreon page here.
  • You are also welcome to make one-off donations on my Ko-fi page.
  • Follow me on Instagram.  I announce new blog posts, share images from behind the scenes and post lots of woolliness.
  • Read the new book Knit (spin) Sweden! by Sara Wolf. I am a co-author and write in the fleece section about how I spin yarn from Swedish sheep breeds.fleece section about how I spin yarn from Swedish sheep breeds.
  • In all the social media I offer, you are more than welcome to contact me. Interacting with you helps me make better content. My private Facebook page, however, will remain private.
  • I support Centro de textiles tradicionales del Cusco, a group of talented textile artists in Cusco, Peru who dedicate their work to the empowerment of weavers through the revitalization and sustainable practice of Peruvian ancestral textiles in the Cusco region. Please consider supporting their work by donating to their causes.

Tweed pocket

I think it’s time for another tie-on pocket, don’t you? This time I let a men’s jacket in Harris tweed share his abundance of pockets for my tweed pocket visions.

I use the term tie-on pocket in this post to refer to the pocket I’m sewing, not to confuse it with the jacket pockets I’m using for it. Usually I just call the tie-on pocket a pocket, but that would be a bit challenging in this case.

My tweed pocket, made from a tweed pocket.

Diving deeper into the history and traditions of tie-on pockets I’m increasingly fascinated by how much we can learn from them. They can tell us a lot about gender inequality of history and present, but also about women’s empowerment in how they have used tie-on pockets.

Men’s pockets

I read The Pocket – a hidden history of women’s lives by Birgit Burman and Ariane Fennetaux that during the period on which the book focuses (1660–1900) men’s clothing was always equipped with several pockets for items that were considered important and significant to men – pockets for bottles, sandwiches, watches, coins and bank notes. Women’s clothing had no pockets at all, instead they had tie-on pockets. These could contain various objects – needles, herbs, handkerchiefs, coins, bread etc, and could be tied off, unloaded and changed several times a day should the bearer wish to.

A 1940’s army jacket with ten pockets. For men.

I came to think about the brilliant HBO series Gentleman Jack and the series adaptation of the life of Anne Lister, a 19th century lesbian woman who kept a journal in code. The diaries were eventually found but kept hidden to save them from destruction. Anne Lister was also an estate owner and colliery owner. She dressed entirely in black, which was normal for gentlemen at the time. In the series, all the dresses, jackets and waistcoats the character Anne Lister (played by Suranne Jones) wears have visible pockets, and lots of them.

While women’s garments do have pockets these days, it still doesn’t seem to be obvious. I usually mutter about skirts and pants with too small, too flimsy or too few pockets or no pockets at all. Count to that the increasing size and weight of smart phones, that can easily tilt trousers or tear ladies’ trouser pockets. I own a men’s wadmal jacket from the Swedish army, made in the 1940’s. It has ten very sturdy pockets.

A vision in tweed

Ever since I started making my first pocket I have been playing with the idea of a pocket in tweed, perfect for the autumn. I decided I wanted my pocket in Harris tweed. For a while I tried to find online stores in Sweden that would sell Harris tweed, but I couldn’t find any. I started looking at web shops in the U.K, but with shipping and import tax it would be quite pricy.

Some shops had fabric samples. Since I had abandoned the import idea I decided to go to the Scottish House in Stockholm, a shop specializing in Scottish clothes and fabrics. I asked for samples, but they didn’t have any. The shop keeper suggested I look for a tweed garment in thrift shops, which was a brilliant idea. That would give me the opportunity to use both the tweed fabric and details in the garment while at the same time upcycling a used item.

Meet Bernie

For a few months I monitored Swedish eBay for tweed vests and jackets, and in August I found what I was looking for – a large brown vintage herringbone men’s jacket in Harris tweed, with side, chest and inner pockets, for $21. I call him Bernie.

Looking at Bernie I count to five pockets, while my own women’s Harris Tweed jacket (also a find from Swedish eBay) has three. Two side pockets and one tiny and ridiculous pocket, way too small for a hand to put something in it, let alone fetch something out of it.

Meet Bernie, a generous jacket with pockets to spare and share.

The pattern seems to repeat itself – while Bernie has been equipped with generous pockets in large amounts, my own tweed jacket pockets are small and fragile. But Bernie is a generous jacket. He knows he has pockets to spare. He also knows that sharing some of his many pockets doesn’t make him less of a jacket. Quite the contrary – by sharing his pocket wealth he will contribute to making the world a better place since more people get access to pockets, people who are just as deserving of pockets as he is.*

And don’t worry, I will use every last piece of fabric from Bernie, so he still has the chance to contribute to lots of other projects.

* I didn’t come up with this myself. I borrowed it from Heather McGhee’s brilliant book The sum of us: What racism costs everyone and how we can prosper together. Read it.

Swedish or British?

So, back to my tie-on pocket project. I needed to make a decision about the model. I wanted to use one of Bernie’s pockets as an opening to my tie-on pocket. Most Swedish tie-on pockets have a horizontal opening (see my embroidered linen pocket and my påsöm pocket). I like them because it is easy to find my way into them. British tie-on pockets, on the other hand, usually have a vertical opening (see my upcycled linen pocket), keeping the shape neat and sturdy. I like that too.

A biased opning for my tweed pocket.

So what would I go for – a swift access to the pocket belly or a sturdy opening? Bernie’s side pockets were horizontal, but made for a large man’s hand. Therefore I feared a horizontal opening might be a little too wide. I could of course flip the jacket sideways and make the opening vertical. But with the tweed fabric being quite bulky in several layers with the welt pocket and the flap, a vertical opening might work against me. So I decided on a compromise – a biased opening. That would limit the wearability to one hip, but I always wear my tie-on pocket on my right hip anyway. Should I need one for my left I still have one of Bernie’s side pocket left.

Swenglish

I cut the pocket from Bernie with the template in Hamblemouse’s pocket pattern. Since Bernie’s pocket opening led to a pocket pouch sandwiched between the tweed and the jacket lining I cut an opening in the lining and sew the edges of the cut onto the edges of the welts so the opening of my tie-on pocket would actually go inside its lined belly.

I took advantage of Bernie’s inner pocket and used it for the lining for the back of my tie-on pocket to give it a secret inner pocket. It also harboured the Harris Tweed label, which I kept there as a sweet detail.

Sewing the tie-on pocket together was a little bulky, but I still like the rusticity of it. This pocket will not fold in the autumn storms!

The band

I wove a band for my new tie-on pocket with stashed suspended spindle spun yarn from rya outercoat fibers. I tried to stay as close to the two colours in the herringbone tweed as I could – one brown and one light beige, from the rya flock friends Bertil and Beppelina.

After having warped and made the heddles for the band I realized that I had made errors in the warping. There was nothing else I could do than unravel the whole warp and start anew.

A backstrap woven band for my tweed pocket. Stashed suspendle spindle spun yarn from outercoat of rya wool.

After the rewarping the weaving was such a joy. I really love weaving little bands. They are so portable and sweet and a perfect opportunity to learn something new on a small surface.

Dan and I treated ourself to a weekend away a couple of weeks ago, to Varberg on the Swedish west coat. I wove on the train there, connecting the far end of the band onto the coat hanger on the back of the seat in front of me. I also wove in the medieval Varberg fortress. It felt very special to weave in atmosphere where women most certainly would have both woven bands and worn tie-on pockets.

If you are a patron (or want to become one), I treat you to a bit of our journey to Varberg in my October video postcard.

Flaunting my tweed pocket

I wore the pocket at the office this week. I hadn’t finished the tassel lanyards yet, but wearing the tie-on pocket at work gave me the perfect little crafting project for the coffee breaks.

The pocket fits very well. I equipped it with my mobile phone and a banana and they got along just fine in the belly of the pocket. The pocket works well with most fabrics and styles, like tweed tends to do.

I have the feeling this tie-on pocket can become an everyday favourite. The biased opening is very comfortable and I like that I can wear the flap in or out. The inner pocket isn’t ideal for my mobile phone, though. Even if the phone fits fits in the inner pocket, it’s placed too high for the phone to get into the inner pocket from the main opening. But there are other things I can hide in my secret inner pocket.

Oh, I recently bought a bikini. The bottom piece has pockets.

Happy spinning!


You can find me in several social media:

  • This blog is my main channel. This is where I write posts about spinning, but also where I explain a bit more about videos I release. Sometimes I make videos that are on the blog only. Subscribe or make an rss feed to be sure not to miss any posts.
  • My youtube channel is where I release a lot of my videos. Subscribe to be sure not to missanything!
  • I have a facebook page where I link to all my blog posts, you are welcome to follow me there.
  • I run an online spinning school, welcome to join a course! You can also check out my course page for courses in Sweden.
  • On Patreon you can get early access to new videos and other Patreon only benefits. The contributions from my patreon only benefits. The contributions from my patrons is an important way to cover the costs, time and energy I put into the videos and blog posts I create. Shooting and editing a 3 minute video takes about 5 hours. Writing a blog post around 3. You can read more about my Patreon page here.
  • You are also welcome to make one-off donations on my Ko-fi page.
  • Follow me on Instagram.  I announce new blog posts, share images from behind the scenes and post lots of woolliness.
  • Read the new book Knit (spin) Sweden! by Sara Wolf. I am a co-author and write in the fleece section about how I spin yarn from Swedish sheep breeds.fleece section about how I spin yarn from Swedish sheep breeds.
  • In all the social media I offer, you are more than welcome to contact me. Interacting with you helps me make better content. My private Facebook page, however, will remain private.
  • I support Centro de textiles tradicionales del Cusco, a group of talented textile artists in Cusco, Peru who dedicate their work to the empowerment of weavers through the revitalization and sustainable practice of Peruvian ancestral textiles in the Cusco region. Please consider supporting their work by donating to their causes.

Mending hems

The other day I got a pair of third hand jeans. They fit me perfectly, but parts of the hems had been worn out, so I wanted to mend them. I threw out a question on Instagram and asked for advice on how to mend the hems. I got lots of really useful replies, some of which I decided to use and some of which to save for later. This post is all about mending hems.

When I was teaching at Sätergläntan craft education center this summer I met a woman who had the most beautifully visually mended pair of jeans. There were colourful embroideries all over the legs and they were just a joy to see. She had had them for 20+ years and mended them as soon as she had seen a hole, wear or tear.

One of my worn-out jeans leg hems.

With the mended pair of jeans as an inspiration I decided to take care of my own pair and mend them visibly as soon as I needed to, starting with the sad hems.

Decisions, decisions

Among the replies to my Instagram question, some were leaning towards blanket stitching around the hem, others towards embroidery and some towards a bias band. One suggested weaving straight onto the hem. I decided to embroider on a bias band on one leg and sew a tight blanket stitch on the other. The weaving I will save for later. I feared that it might get too bulky on a pant leg hem.

Blanket stitch

Both leg hems were worn, one a bit more and wider than the other. I chose the blanket stitch for the less worn leg. I have a box full of thrift shop embroidery yarn in wool, silk and linen. But for a pair of jeans I would need cotton. The only cotton yarn I had was a melange pink pearl cotton one, which was perfect for visibly mending hems.

I think I will keep my eyes open for more melange pearl cotton for future mending emergencies, I really liked this one.

Bias tape and sashiko

I wanted to use sashiko as the main mending technique for the more worn leg. I had bought a bundle of 26 beautiful Chinese handwoven vintage cotton patches from the 1960’s from Indigoloom that I wanted to use. They are all great candidates for both a bias tape and other mending techniques. Since I wanted to make my own bias tape out of the Chinese patch – another great tip from my Instagram question – I had ordered a bias tape maker.

The loveliest bundle of cotton patches, hand woven in China in the 1960’s.

In the Ultimate Sashiko sourcebook by Susan Briscoe that I had in my book shelf I found sweet patterns based on chequered fabrics. There were a lot of those in the bundle and I chose one of them. I figured that as a beginner it would be a good idea to use a chequered fabric pattern as a guide when I did the stitches.

The world isn’t square!

As I meticulously measured the cutting angle and width of the bias tape-to-be I realized that something was wrong. Only I couldn’t figure out what. I saw that I had measured the angle and the width correctly, but still the checks didn’t add up. Measuring again and again I scratched my head until it dawned on me: There was a weaving error!

A bias tape to be from a vintage Chinese hand woven cotton fabric with, as it turned out, sweet irregularities.

I had made the mistake of counting on the squares to be square. But that’s the thing – the world isn’t square! It’s full of wonderful irregularities and differences. Therefore, so is my bias tape.

The making of a bias tape

Making the bias tape was quite entertaining. Once I had cut the fabric on the bias I eagerly waited for the bias tape maker to arrive. Once it did it took me five minutes to grab the iron and ironing board and make the tape.

The bias tape maker is just a metal guide where you stick the flat strip of bias fabric into one end and end up with a folded tape in the other. As soon as the folded end appears you just iron it and there you have it!

My very first bias tape, made from a vintage hand woven Chinese cotton fabric.

I cut the frays on the pant leg edges and stitched the tape by hand on the inside of the leg with a backstitch. I stitched the top of the tape onto the front of the leg with a whipstitch.

Sashiko pattern

I used a komezashi variation for the sashiko part, that took advantage of the chequered fabric pattern. This meant that I didn’t have to create a grid for my stitches since it was already there. I did want to continue the pattern above the tape, though, so I did my best to follow the lines from the tape onto the denim.

When mending my hems I allowed the sashiko stitches to run over the denim as well as the tape.

Since the bias tape was longer than I needed I could easily have cut out the weaving error. I chose not to, though, but instead to embrace the perfectly flawed irregularity and work with it as it was. It will serve as a tribute to the weaver who reminded me that the world isn’t square.

It was interesting to use the sashiko technique for mending. I haven’t tried it just for the sake of sashiko yet, but I have plans to make little sashiko project pouches. Perhaps to keep my sashiko kit in.

Mending with love

I love my old new pair of jeans. Every time I mend them, which will be a treat and an act of love in itself, I will get that feeling that a new piece of clothing can give. A new start, a fresh breath. But with a smaller ecological footprint and hopefully with the inspiration for others to mend their own clothes with love.

A pair of mended hems.

As I plan to keep mending my jeans I also ordered a book on visible mending by Arounna Khounnoraj . It’s supposed to come next week. I’m secretly looking forward to more wear on my jeans. There is so much to explore! Thank you all who contributed to my cry for hem mending help.

Happy mending!


You can find me in several social media:

  • This blog is my main channel. This is where I write posts about spinning, but also where I explain a bit more about videos I release. Sometimes I make videos that are on the blog only. Subscribe or make an rss feed to be sure not to miss any posts.
  • My youtube channel is where I release a lot of my videos. Subscribe to be sure not to missanything!
  • I have a facebook page where I link to all my blog posts, you are welcome to follow me there.
  • I run an online spinning school, welcome to join a course! You can also check out my course page for courses in Sweden.
  • On Patreon you can get early access to new videos and other Patreon only benefits. The contributions from my patreon only benefits. The contributions from my patrons is an important way to cover the costs, time and energy I put into the videos and blog posts I create. Shooting and editing a 3 minute video takes about 5 hours. Writing a blog post around 3. You can read more about my Patreon page here.
  • You are also welcome to make one-off donations on my Ko-fi page.
  • Follow me on Instagram.  I announce new blog posts, share images from behind the scenes and post lots of woolliness.
  • Read the new book Knit (spin) Sweden! by Sara Wolf. I am a co-author and write in the fleece section about how I spin yarn from Swedish sheep breeds.fleece section about how I spin yarn from Swedish sheep breeds.
  • In all the social media I offer, you are more than welcome to contact me. Interacting with you helps me make better content. My private Facebook page, however, will remain private.
  • I support Centro de textiles tradicionales del Cusco, a group of talented textile artists in Cusco, Peru who dedicate their work to the empowerment of weavers through the revitalization and sustainable practice of Peruvian ancestral textiles in the Cusco region. Please consider supporting their work by donating to their causes.

Upcycled linen pocket

A while ago I stumbled upon a vintage handmade embroidered linen purse on Swedish eBay. I immediately fell for the fabric and the embroidery. In this post I take you through my process of turning the purse into an upcycled linen pocket.

The purse was a bit too large for my taste and I have never understood the purpose of a bag that is meant to be held in the hand. How are you supposed to be able to craft if your hands are busy holding a bag?

The purse was beautifully made. The ad said hand woven and I have no reason to argue with that. The embroidery is very sweet in its simplicity and the two subtle colours. Both the front and the back of the purse were lined and all seams hand sewn.

British vs Swedish pockets

When I saw the ad I was reading the beautiful book The Pocket: A hidden history of women’s lives, by Barbara Burman and Ariane Fennetaux where all known secrets of tie-on pockets between the 17th and late 19th centuries are revealed. So naturally my mind went to a pocket when I played with ideas for the purse fabric.

If you make a search on the Swedish digital museum for kjolsäck, the Swedish word for tie-on pocket (literally meaning skirt sack) you find lots of embroidered and embellished pockets (and some plain) with a horizontal opening. In the book The Pocket, though, covering only British pockets, nearly all the samples have vertical lined openings and basically the same design throughout the the book, in both samples and artwork picturing pockets.

My first pocket was inspired by the traditional Swedish pocket design – in a rounded shape and with a horizontal opening.

I made my first pocket with more of a Swedish design with a horizontal opening. So why not make this one like the British model I had spent so much time reading about?

A pocket pattern

When I published pictures of my first pocket in social media I got a response from Anne/Hamblemouse who wants us to revolt and take tie-on pockets into the 21st century fashion. And why not – when there finally are pockets in women’s clothes they are usually too small and simple. And mobile phones usually too large and too heavy for said pockets.

Anne makes and sells tie-on pockets inspired by old patterns such as the ones in the book mentioned above. She also sells kits for making your own pocket, and patterns. I wanted to make a pocket the British style and figured a proper pattern would be perfect, so I bought Anne’s pocket pattern.

Anne’s pattern is very easy to follow and paves the way for a beautiful and sturdy pocket.

The pattern has very clear instructions with a thorough and sensible process. While the pattern is made for hand sewing nothing will stop you from machine sewing your pocket. I chose to hand sew mine. I mean, why bring out a 17 kilo sewing machine from the -60’s when you can enjoy some peace and quiet with needle, thread and some sweet hand sewing?

Anne’s pattern suggests lining the front piece. The lining peeks through the opening and strengthens it in the smartest way. My eBayed bag was lined in both front and back piece, so I used the lining for the back piece as well.

Basting!

The pocket pattern calls for basting/tacking in nearly all the seams. And what a beautiful invention basting is! I haven’t reflected much about basting before (and I used to sew a lot), but this pattern really opened my eyes for basting. It may take a little longer, but it will also give you more time with a lovely fabric in your hands. And once basted the main seam is a breeze to sew.

A woven band

I needed a band for the pocket and I wanted to weave it. I turned to Kerstin Neumüller who sells lovely linen weaving yarn for her band weaving workshops. She didn’t have the exact colours to match the embroidery on the bag, so I went with two shades of blueish grey to at least match the subtle shine from the combination of two colours on the bag.

At the time I had a migraine and stayed home from work. Weaving a band on the balcony may not take the migraine away, but it did take my mind off it for a while.

The yarn was so smooth to weave with, the shed opened itself and I just lifted my heddle strings and let the weft yarn sing its way through the warp.

Round braids to finish the warp ends in a tassel-like fashion.

Since the ends of the band would be visible I chose to make them fancy – I made round braids of the warp ends for a tassel look. The braids are fiddly to make and takes a bit of time (seven minutes per braid and there were 24 of them), but it was definitely worth the effort.

Upcycled linen pocket

After having braided until my hands couldn’t move anymore I was finally finished. I basted and attached the band to the bag and wove in all ends.

I do love this pocket, it turned out even better than I had imagined. It’s sturdy, strong and does its thing. I can choose to wear it when my pockets are non-existent, too small or too weak for whatever I want to carry in them.

I’m not finished with tie-on pockets. I have ideas for at least three more in different materials, techniques and styles. And it’s just that – there is so much you can do with a small project like a pocket. You can make it in different materials, styles, with or without embellishments. You can embroider, try out new techniques or combinations or just enjoy a moment with a small sewing project. And you get to weave a band! There is room for so much more than physical objects in a pocket.

By the way – Does anybody have use for a bagless bag handle?

Happy spinning!


You can find me in several social media:

  • This blog is my main channel. This is where I write posts about spinning, but also where I explain a bit more about videos I release. Sometimes I make videos that are on the blog only. Subscribe or make an rss feed to be sure not to miss any posts.
  • My youtube channel is where I release a lot of my videos. Subscribe to be sure not to missanything!
  • I have a facebook page where I link to all my blog posts, you are welcome to follow me there.
  • I run an online spinning school, welcome to join a course! You can also check out my course page for courses in Sweden.
  • On Patreon you can get early access to new videos and other Patreon only benefits. The contributions from my patreon only benefits. The contributions from my patrons is an important way to cover the costs, time and energy I put into the videos and blog posts I create. Shooting and editing a 3 minute video takes about 5 hours. Writing a blog post around 3. You can read more about my Patreon page here.
  • You are also welcome to make one-off donations on my Ko-fi page.
  • Follow me on Instagram.  I announce new blog posts, share images from behind the scenes and post lots of woolliness.
  • Read the new book Knit (spin) Sweden! by Sara Wolf. I am a co-author and write in the fleece section about how I spin yarn from Swedish sheep breeds.fleece section about how I spin yarn from Swedish sheep breeds.
  • In all the social media I offer, you are more than welcome to contact me. Interacting with you helps me make better content. My private Facebook page, however, will remain private.
  • I support Centro de textiles tradicionales del Cusco, a group of talented textile artists in Cusco, Peru who dedicate their work to the empowerment of weavers through the revitalization and sustainable practice of Peruvian ancestral textiles in the Cusco region. Please consider supporting their work by donating to their causes.

Linen pocket

A while ago I started to take an interest in loose pockets. When my friend Cecilia and I got to dress in 18th century clothing when we shot the Walking wheel video at Vallby open air museum I desperately wanted to wear a loose pocket underneath my skirts. And when we were on a guided tour in the costume collections at Skansen open air museum I asked if we could see the loose pockets. Today I present my linen pocket. Warning: Nothing in this post is spinning related.

Can we talk about the size and weight of mobile phones? And the existence and if so the size of pockets on women’s trousers, skirts and dresses? With the few clothes that happen to have pockets large enough for a mobile phone the weight of the device turns the clothing askew. They may also tear or break.

As we got dressed for the Walking wheel video I insisted on finding loose pockets to wear underneath our skirts. Perfect for not so 18th century things like mobile phones, mini tripods and credit cards.

A loose pocket on the other hand is the perfect solution for both nonexistent, too small or torn pockets. It can be used and mended while keeping the trousers reasonably whole. The thought of different pockets for different occasions, seasons, mood or simply the crafting craving of the day is also appealing.

Loose pockets

A loose pocket is just what it sounds like – a loose pocket to wear around your hip, either plain and secretly underneath a skirt or visibly and decadently embellished, some semi visible with embellishments on only one half. Kjolsäck is the most common word for this accessory in Swedish – meaning skirt pouch. At a guided tour at the costumes collection at Skansen open air museum we got the opportunity to look at beautifully embellished kjolsäck pockets from different areas in county Dalarna.

Typically the wearer would keep important things like needles and a sewing or knitting project in the pocket, as well as herbs for staying awake during long church visits and perhaps something to keep the children at peace.

A pocket dream

I am not sure where this pocket dream came from, but it has been lurking in the back of my mind for a while, squeaking silently every now and then to remind me of its existence. I had an embroidery pattern in another corner of my mind, intended for something else, but as I realized that I could experiment with a pocket of my own I decided to practice the pattern on the pocket.

My plans for my first linen pocket.

Since I have no connection to either traditional regional costumes or reenactment I decided to make a style that I wanted and not follow regional costume rules or historical correctness. I just wanted a pocket to fit my needs now.

Recycled linen pocket

While I was planning my pocket project I decided to only use material that I had at home or that I had eBayed.

  • I bought two linen damask towels from Swedish eBay for the pocket material.
  • The linen embroidery yarns are also from Swedish eBay.
  • The linen weaving yarn is a commercial yarn from my stash.
  • I found a tablet woven band that I made a few years ago in a band weaving frenzy.
  • At the last minute I realized I needed key carabiners for the loops, and I got them from Swedish eBay too.
  • And oh, the embroidery hoop comes from a flea market.

A pocket recipe

Front and back

The first thing I did was to draw a line around my spread-out hand to find a size. I drew a shape I liked and transferred it to the pink (back side) towel. I made slightly larger version that I transfered to the turquoise (front side) towel. That way I got the opportunity to frill the front piece for a bellows effect. I also figured the bellowed front side would keep the pocket flat against my hip.

Embroidery

When the shape was drawn on the front side towel I started embroidering an amoeba shaped pattern with a couching stitch (läggsöm). I love the freedom of this stitch, I can just let the yarn lead the way and enjoy the ride. When I was happy with the embroidery I ironed interfacing on the back of the front side for protection and extra sturdiness. I cut out the front side and two back sides, with interfacing on one of them. To keep the shape neat I added an inner pocket for my mobile phone on the back piece and two band loops with carabiners for important stuff like keys and needle cases.

Shaping

While I ruffled the bottom of the front pice for extra room I kept it tight at the top for a neat opening. I added a protecting Kumpay seam at the top of the pocket opening. I found it in the book Secrets of spinning, weaving and knitting in the Peruvian highlands by Nilda Callañaupa Alvarez and in an online course by Laverne Waddington.

Weaving, tubular and flat

After having tacked the front and back pieces together I wove and sew a tubular band in a linen yarn as an edging. This is common in the Andes and I found the instructions in the same sources as the Kumpay stitch. It was a bit fiddly and has a charmingly irregular look.

At this stage I had a very limited amount of the turquoise colour left. For the ties I used the same weaving yarn and wove a 180 cm band, ending with pretty cords of the warp ends. The colour pattern is carefully planned and only a meter or so remains of the turquoise yarn.

I warped the ties as a circular warp, which always fascinates me. But then again, weaving is such an amazing art form and I am only nibbling gently at a very small edge of the weaving universe.

A myriad of details in a small project

I love making small projects. It gives me the opportunity to try new techniques and adding details. The couching stitch, the Kumpay edging, the tubular band and the cords, all quite time consuming, but on a small project still doable.

Herbs and things for the kids aren’t my first choices to inhabit my pocket. I’m more into housing my mobile phone (or my husband’s in this case since I took the photo with mine) and any sort of textile project. The mini Pushka is there for good luck.

For the finishing touch I hand stitched the woven band onto the pocket. I had no idea really what to do with the warp ends of the tubular band, and I decided to simply tuck them in between the two back piece layers and hope they would behave.

More pockets to come

I have loved my first pocket project. There will be more pockets. I have learned from my first project and I will make some alterations for future projects. The linen towel was a little to thin and wobbly, at least on the front piece that was single. I may alter the size and the amount of bellow room. I like the opportunity to fit stuff into the pocket, but at the same time it mustn’t be too big and clumsy.

This will be a summer pocket and for my next I’m planning a more autumnal and wintery, in wool. There is so much to play with and I am ready to dive in.

and oh, a book is on its way to me – Pocket: A hidden history of women’s lives, 1660–1900 by Barbara Burman and Ariane Fennetaux. I can’t wait!

Happy spinning!


Thank you all 237 (a record!) who registered for last week’s breed study webinar on Åland wool and all 65+ who came to the livestream. I had the loveliest time!


You can find me in several social media:

Old sheets

My parents still have monogrammed sheets, table cloths and towels from when they got married in 1965. When I moved to my own apartment as a 20-year-old I got some of them with me. They have started to look a bit worn now, but they have served us well during all these years. Today I celebrate old sheets.

We spent last week in a rented cabin in Tiveden, between the two largest lakes in Sweden. As a city woman I obsess over flea markets and second hand stores whenever I get to the countryside or smaller cities. Stockholm doesn’t have what I’m after: Old textiles, especially bed linen.

Flea markets

There is a large flea market a 45 minute drive from the cabin. Last year it was closed due to the covid restrictions, so I was extra jazzed about going this year. During the past years there has been a giant table with textiles at the flea market. A woman traveling the countryside collecting old textiles from forgotten linen cabinets runs the table and has a trained eye for the good stuff. Previous summers I have bought sheets and pillowcases of remarkable quality, some hand woven. I wouldn’t be surprised if they were over 100 years old.

The textile table at the flea market the first time I saw it a few years ago.

A dream of the future

The material of the old sheets is thick and dense and filled with the promise of a good night’s sleep. Most of the sheets have monograms and some lace edgings and embellishments. Some are hand sewn, some even hand woven. You can barely see the mid seam that joins the left and right side of the weaves of a narrow hand loom.

A hand woven monogrammed and laced sheet. Can you see the vertical center seam?

Who made those monograms and laces? What was going through her mind as she stitched them? How late at night did she work with the needle? What were her dreams of the future? Did she sleep happily on her sheets? Did it occur to her that some of her sheets would be forgotten and some cherished by new generations?

Hand woven cotton/linen towels. Since there are pieces of cellulose in the linen threads my guess is that the linen yarn was hand spun from someone’s hand processed flax.

The sheets my parents got back in 1965 were store bought. My father designed the monogram and they had them machine sewn at a monogram service before the wedding. It took me many years to realize that the mysterious stitch formation was actually my parents initial letters. As a child they were just there on all sheets, as natural as the sheets themselves.

When I asked my mother about her and my father’s monogram I also asked of she could look for older family monograms in their linen cabinet. She found some from the late 19th and early 20th century from all sorts of great-great aunts.

Berta’s flax

Many of you may have heard of Berta’s flax. This is a project started by Christiane Seufferlein who got an old dowry chest from a relative to Berta, a woman who got married in Austria in the 1940’s. The chest was filled with processed flax, which worked as a security for a woman. Christiane decided to share the flax with the world and spends her free time shipping flax all over the world. Berta’s flax is long gone, but after came Maria’s, Rosa’s and other women’s flax chests.

In the 1970’s and 1980’s many of these chests were burnt since nobody was interested in their contents. Much like the old sheets I find on flea markets. But these are true treasures. Made with love, hopes and dreams and remarkable skills.

Top and bottom

Through the years on the flea market visits we have bought mainly bottom sheets – machine woven, hand woven, with or without monograms or lace. The important thing is that they are old. A lot of top sheets have been displayed on the textile table too. A top sheet is a longer sheet placed on top of the sleeper, directly under a blanket or patchwork quilt. The top of the top sheet – traditionally embellished with some sort of lace and, of course, a monogram – is folded over the top edge of the blanket.

We haven’t bothered with the top sheets for sale since we use duvets and duvet covers (I don’t even think top sheets are made anymore). But after thinking just a tiny step outside the box I realized that we could use the top sheets as bottom sheets too. Even if the pretty lace would be tucked underneath the mattress they would still be high quality old sheets.

Bad and good fortune

When we got to the flea market this year I went straight to the textile table. Only to find it empty. Empty as in she was not there at all. Not even a thread in sight. We really didn’t need more sheets, but I still love going through her textiles, imagining the lives behind all the monogrammed treasures. And she was such a textile heroine, collecting treasures and saluting women’s skills.

This year's textile harvest included four top sheets and two pillowcases, all monogrammed and laced.
This year’s textile harvest included four top sheets and two pillowcases, all monogrammed and laced.

As we came back to the cabin we went for another ride. This time to a hembygdsgård, sort of a homestead or folk museum. At the gate was a tiny table with old monogrammed sheets. Another textile heroine had saved treasures from the past. I fondled them and saw in my mind our cramped linen cabinet. The sheet section is abundant. However, the duvet covers are not enough and those we have are thinning out.

Old new duvet covers

The oldest duvet covers I have seen are from the 1960’s. Not with the bad quality of today, but still not near the quality of the older textiles. Therefore I don’t bother looking for them on flea markets. So my problem was how to get hold of high quality duvet covers without buying new ones. With another step outside the box I realized that I could make duvet covers with the top sheets! I found two reasonably matching pairs of top sheets (these were made long before standardized sheet measurements) and sewed them together into two smashing duvet covers. A little too narrow for our duvets, and with the four different monograms upside down, but still, heavenly to sleep under.

Our new old duvet covers made of old top sheets of remarkable quality.

Fast fashion

So why is the quality in old sheets so much higher than in modern sheets? Well, this is connected to the fashion industry. The pressure to buy more and new clothes every turn of the season has led to a pressure on the cotton industry. The cotton fibers are shorter to make way for more harvests. The yarn is more loosely spun and the fabrics are woven at a wider sett to save fiber.

Pillowcases

For the past 20 years or so I have slept on an Austrian giant pillow of 80×90 cm. For this reason none of the Swedish pillowcases, old or new, match my pillow. But now, as we have these dreamy pillowcases I have decided to retire my Austrian pillow and buy two Swedish size pillows instead. Filled with wool from Swedish sheep, of course. Soon I will dream sweet dreams on pillowcases thick as cardboard, tied together with sweet bowed ribbons.

A new generation

When Dan and I got married in 1998 we didn’t have monogrammed sheets. We did however get new linen sheets as a wedding present. They thinned out many years ago. We still use one of them, though, as a back curtain to a wool/linen curtain I wove a few years ago for our front door.

Our children won’t have the same memories I did of parents’ monogrammed sheet. For the past years, though they have got used to sleeping on high quality old flea market sheets. They are 16 and 18 now and will move out sooner or later. When they do I won’t get them new sheets for their new homes. I will get them old sheets.

So if you haven’t already, next time you go to a flea market, look for old sheets and bed linen. Get all you can and save these sweet treasures from oblivion.

Sleep tight!


You can find me in several social media:

  • This blog is my main channel. This is where I write posts about spinning, but also where I explain a bit more about videos I release. Sometimes I make videos that are on the blog only. Subscribe or make an rss feed to be sure not to miss any posts.
  • My youtube channel is where I release a lot of my videos. Subscribe to be sure not to miss anything!
  • I have a facebook page where I link to all my blog posts, you are welcome to follow me there.
  • I run an online spinning school, welcome to join a course! You can also check out my course page for courses in Sweden.
  • On Patreon you can get early access to new videos and other Patreon only benefits. The contributions from my patrons is an important way to cover the costs, time and energy I put into the videos and blog posts I create. Shooting and editing a 3 minute video takes about 5 hours. Writing a blog post around 3. You can read more about my Patreon page here.
  • You are also welcome to make one-off donations on my Ko-fi page.
  • Follow me on Instagram.  I announce new blog posts, share images from behind the scenes and post lots of woolliness.
  • Read the new book Knit (spin) Sweden! by Sara Wolf. I am a co-author and write in the fleece section about how I spin yarn from Swedish sheep breeds.
  • In all the social media I offer, you are more than welcome to contact me. Interacting with you helps me make better content. My private Facebook page, however, will remain private.
  • I support Centro de textiles tradicionales del Cusco, a group of talented textile artists in Cusco, Peru who dedicate their work to the empowerment of weavers through the revitalization and sustainable practice of Peruvian ancestral textiles in the Cusco region. Please consider supporting their work by donating to their causes.